3 Simple Strategies to Save Money on Accessory Dwelling Units.
by Sally Lawrence

Ever wonder how to save on Accessory Dwelling Unit (ADU) costs?
What I learned with my first experience of remodeling is that it is waaaay more expensive than I anticipated.
Construction quotes came back with eye-brow-raising numbers, not to mention pricey architect/designers and expensive permit fees.
Talk about sticker shock.
Does this sound familiar?
Or perhaps, the numbers started out looking doable but a material upgrade or two later (it’s hard to walk away from a krion kitchen counter waterfall), over budget hits and so does the stress.
Eventually, I came to the realization that I would need to get creative and put on my big girl pants if this remodel was ever going to happen within budget.
Don’t worry, we were able to make it work within the budget.
In this blog post, I will share 3 strategies I used to lower remodel costs.
These are strategies that have helped me save thousands of dollars in the two ADU remodels (a story for another day) done on my home.
3 Simple Strategies to save money on an ADU
1. Preparation
2. Materials (standard sizes, prefab, bundled)
3. DIY
Accessory Dwelling Unit (ADU) Cost Saver Strategy #1: Preparation
If you are going to successfully manage costs for the addition of an accessory dwelling unit, it is best to start early in the process. How early? In the beginning, you will need to figure out the real costs that come with bringing your ADU dream into reality. And taking a good hard look at your financial situation and coming up with a budget. I know, I know, this is not the fun stuff of clicking through Houzz kitchen design ideas, but it is super necessary.
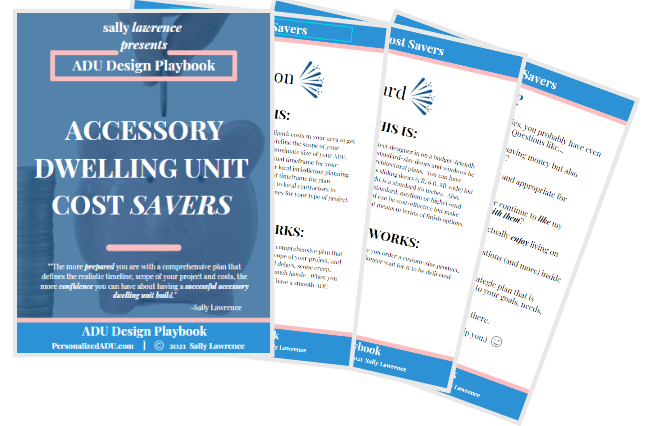
The more prepared you are with a comprehensive plan that defines the realistic timeline, scope of your project and costs, the more confidence you can have about having a successful ADU build.

In terms of timeframe, be prepared for a long-term process. In a nearby city, I heard it is taking 8 months to get a permit. This is definitely a worst-case scenario with permits usually taking a few weeks.
Construction is also a varied timeframe. Depending upon the scope of your project, it can be a couple of months to a year or more to complete the build of your ADU.
That is a while! It’s important to consider what might be taking place in your life for up to a year.
And does the timing allow for a good life balance?
Are you breaking ground on construction at a time when you are starting a new job?
Or when you are pregnant and expecting a baby to come any day?
Being strategic and thinking the timing through will help you keep your sanity through this long-term process!
It’s also important to figure out the scope of your project, which will impact the timeline as well as the costs.
For instance, if you are doing a garage conversion ADU (and your foundation and structure is in good condition), then this can be a simpler, less expensive and faster process.
However, if you are building a 1200 sq ft detached ADU, that will be more costly and take longer.
And you’ll find that it’s important to define the scope of your project early in the decision-making process.
If you don’t have any idea what size ADU you plan to build or what your property will support, it will be very challenging for you and contractors to figure out a ballpark range.
You may have a clear plan for the purpose of your ADU which is important, but coming up with an estimated sq ft is necessary for clarity and moving forward in the process of costing out your ADU.
But what are the costs of an ADU in California? Well, let me break it down for you.
There are 3 categories of cost, my friend.
1. Preliminary costs are things like architectural/structural drawings and permits.
2. Then, there are construction costs.
3. And the ones we often forget: post-project costs like increased property tax and utility bills.

Doing some research on these costs can give you a good ballpark about what it’s going to take to build an ADU. Begin the process of reaching out to professionals to get a sense of their costs.
Unfortunately, there is a lot of variation in costs for construction and architect/designers which is why it is important to reach out.
For instance, a 2019 report showed that the Bay area is the most expensive place in the country for construction at average $417 per sq ft surpassing New York's average of $368.
I encourage you to connect with several different contractors as, even in the same area, construction costs can vary.
This is the same for architects and designers. Architects tend to have a higher costs associated with their degree. Their fee can be thousands to tens of thousands in some cases. Designers are typically less expensive but can also vary.
While construction and plans are not all the costs associated with an ADU build, these are the big ticket items.
Doing this type of homework goes a long way to provide a ballpark number that you can use in ruling in or ruling out the feasibility of an ADU.
Accessory Dwelling Unit (ADU) Cost Saver Strategy #2: Materials
Standard = cost savings
This is super important so let me repeat that standard = cost savings!
Now, remember how we are talking about preparation? Well, saving on materials is also possible with some planning at the design stage.
Say what now?
Yes, when you are working with your designer/architect, there are some things you can do to keep costs down.
For example, cluing in your designer/architect that you are seeking to keep things budget-friendly so the designer can keep this in mind as they design your ADU.
What might that look like?

Well, it can be simple things like making sure that your windows and doors are standard sizes. I am not talking that you have to opt for small and boring.
Just being aware that a standard 2-panel sliding glass door comes in (width of 5 feet, 6 feet, and 8 feet with a height of 80 inches) means you don’t have to pay custom prices which can add thousands of dollars more to your cost.
This can also be applied for bathtubs (30wx60l) and standard vanity sizes (widths of 24", 30", 36", 48", 60" and 72”).
Builders will often offer an A to Z package with finish selections at a standard, medium, or higher-end level. So if you are into an uncomplicated and budget-friendly process, the standard may be a good fit for you.
But, it is super important that you go over what standard means.
Does standard mean a Formica kitchen counter or a prefab granite counter?
Does standard mean particleboard (melamine) cabinets or solid wood cabinets?
If their standard package includes components that are not workable like a Formica kitchen countertop, then speak up (nicely of course) and ask if it is possible to switch out to an alternative.
If necessary, you may end up paying a little extra to cover the difference but you won’t have to look at that Formica countertop for the next decade so it's worth it, am I right?
Here is another truth nugget: Prefab = cost savings!

A general rule of thumb is that if you can buy it off the shelf ready to go, it will be cheaper than having a custom process.
For example, pre-fabricated stone countertops are a lot less expensive than a stone slab that needs to be cut and polished to your specifications.
That goes for kitchen countertops and also bathroom vanities where there are off-the-shelf options that have a standard width stone countertop with an integrated sink attached.
Another example is wood flooring.
We made the mistake of purchasing unfinished wood plank flooring and then had to hire someone to sand, stain, and coat the wood when you can purchase wood plank flooring that is pre-sanded, stained, and coated! With many more coats than what we got from our wood finishing contractor.
If I didn’t mention it, the pre-sanded/stained/coated wood plank flooring ended up being less expensive and would have saved me from having to find and coordinate the contractor.
Can ya tell this one still stings?
But it is ok, especially if sharing this experience can help someone else not make our mistake!

Bundled materials = cost savings + less headaches!
Oftentimes, you can find a bundled deal that is all coordinated for you and cheaper than if you purchased all the pieces individually.
For example, I purchased a vanity set that came with a vanity, stone countertop, integrated sinks, and mirror. It was modern, beautiful and best of all saved hours and hours of shopping trying to match everything together. The only thing left was to buy a pair of faucets!
Did I mention that it was cheaper than buying it all separately, too? Dontcha love it when you have those WIN-WIN scenarios?
Accessory Dwelling Unit (ADU) Cost Saver Strategy #3: DIY
Ok, this last one is not just about being a prepared smart cookie.
This one is HARD and involves some sweating.
Are you willing to sweat a little to save some bucks?
I am a bit of a Netflix and coffee girl myself (doesn’t that sound better than couch potato?).
But I pulled up my yoga pants and went to town diy-ing to save some dollars.
Luckily, the hubby is a hardworking engineer type with a confident "I am super smart so how hard can it be?” attitude.

Let’s start with the easy first.
The painting was not so bad and it surprisingly did save us a big chunk of money by painting the interior and exterior of the ADU.
OK, ok, I did regret my decision to use a different ceiling color from the walls but that was only during the sweating.
Afterward, I patted myself on the back for choosing a white ceiling color that DID make the room more spacious! If you can round up some buds to help in exchange for bbq and mimosas or beer, this task can go quick.
Another DIY project that was not so bad was painting and installing baseboards and trim. This was one where you get a rewarding visual or a quick win for your work.
I learned through the DIY process that I am more motivated by the pretty work.
If it looks pretty faster, the sweat and sore muscles seem worth it.
Baseboards and trim are one of those types of projects. It is also a project that is on the relatively easy end of things.

OK, the next DIY project is a bit harder but still doable when armed with youtube videos.
I am talking about the installation of click lock flooring. This would be Pergo, vinyl plank, or engineered wood flooring.
If you are planning to use this type of flooring, installing these floors yourself can save quite a bit of money depending upon how large an area you are doing.
Now, for those of you who are not allergic to dust and grime, literally or not, drywall, taping, mudding, and texturing can be significant cost savings.
Not going lie, I did not enjoy this one and it took too long to be pretty.
There were so many steps, 3 repetitive coats of application with each one requiring sanding and kicking up so much dust.
Still traumatized by the ceiling and corners.
Even after all that part is done, then you still have to texture and knockdown. It was a dragged-out process.
BTW, it is so much harder to find buds or even family members willing to help with this one.
But, again, the point, it did save us bucks!
To be honest, I would rather have a contractor do all these tasks…remember, Netflix and coffee girl here, but it did save us quite a bit, which meant I could splurge on stone countertops for the kitchen and bathroom. Worth it! 😍

Conclusion
To recap, it is key to be smart about the materials you select for the ADU project.
Definitely get educated about standard sizes for materials (doors, windows, bathtubs, etc.) to incorporate in the design stage.
Also, stick with prefab or off the shelf rather than custom anything, and where possible, buy bundled materials (vanity set) which are cheaper than purchasing individual items and way less trouble.
The second strategy is about putting in some labor and doing some DIY projects (painting, baseboard/trim, click lock flooring, drywall taping, mudding, texturing).
Lastly but most important, is preparation, preparation, preparation! Comprehensive planning results not only in cost savings but also in being able to feel empowered and confident as you embark on the ADU building journey in California.
Ready for more cost-saving strategies for your Accessory Dwelling Unit?
Get the comprehensive free guide below!
CATEGORIES
FEATURED POSTS
-

Research Tips To Evaluate Accessory Dwelling Unit Possibility.
-
4 California Accessory Dwelling Unit Options.
-
Essential Family Strategies To Deal With A Home Renovation.
-
The Secret to a Successful Accessory Dwelling Unit Construction Experience.
-
Accessory Dwelling Unit Benefits For Families.
-
Boomerang Kid Affordable Housing On Family Property.


Get The Accessory Dwelling Unit
Cost Saver Free Guide
Six strategies for significant savings
on your Accessory Dwelling Unit build!
Your information is kept 100% private
& never shared. As a bonus,
you'll receive emails with offers + helpful tips.
You can unsubscribe at any time.
© 2023 Copyrights by Sally Lawrence. All Rights Reserved.
